I was invited to present at the TechFest Online Conference today, Tuesday 3 December 2024. It is organised annually by The Science Hub (East Herts, Essex, Beds and MK). I had a good one and a half hours to present Moss Safari, which is an unusual luxury and it paid off. This was a great opportunity to share some of the behind the scenes techniques that I use to deliver and present Moss Safari at different events. Below are some of the secrets I shared, what we found and some feedback from the technicians.

In this session I introduced four methods to collect the organisms from moss to study them under the microscope. They each have their advantages and disadvantages.
If you are new to Moss Safari, here is what a typical online Moss Safari entails.
1. Suck and see

Place pipette tip on soaking moss.
Suck up water through the moss.
Hold pipette upright (tip down) for 30 seconds to allow organisms to fall down to the tip.
Place 2-3 drops onto the dimple slide and observe.
Great for quick, whole class Moss Safaris.
Very hit and miss.
2. Moss Squeeze

Soak moss.
Rough up surface with a pencil or pipette to dislodge organisms.
Squeeze moss cushion into a dish or (carefully) directly onto the slide.
Great for whole class Moss Safaris.
Can be messy. Must wash hands afterwards.
A bit hit and miss.
3. Moss Squeeze Filter

Soak moss, 24 hours.
Squeeze moss cushion into a filter paper and collect concentrated sample in a pipette.
Note: collect the detritus in the corner of the filter paper, not the water that comes through the filter paper into the beaker.
Great for whole class Moss Safaris. High hit rate.
Takes more time, can be messy. Good for older students to improve practical skills.
Can be used as a pre-lesson batch, so the moss squeeze is prepared for the students and they can get on with observing straight away.
4. Gravity collection

Take a length (20 cm) of plastic tubing that will fit tightly to to a funnel. Fold the other end of the tubing up so it seals the end, hold it in place with a bulldog clip or similar. Place a gauze in the top of the funnel (I use a tea strainer that fits the diameter of the funnel). Place moss on the gauze. Use a retort stand to hold the funnel and tubing vertically, I also place the apparatus in small container to catch spills. Fill the tube and funnel to the top with mineral water, so that the moss is submerged. Leave overnight. To collect the debris at the bottom of the tube, remove moss and gauze, pour away most of the water until just a few mls and the debris is left at the bottom. Carefully undo the bulldog clip, unfold the tube over a small beaker and collect the debris with water. This will have a lot of organisms in it.
This takes time to set up and needs overnight to collect. It is more complicated set up, but it high yielding – high hit rate.
Great for preparing Moss Safari samples for several classes or events.
What we found
I prepared two slides using each method and then we observed what we had ‘caught’ on each slide.
Method 1 yielded few organisms but we did have a mass of single celled organisms and a rotifer. The single celled organisms are in the video below taken at x40.
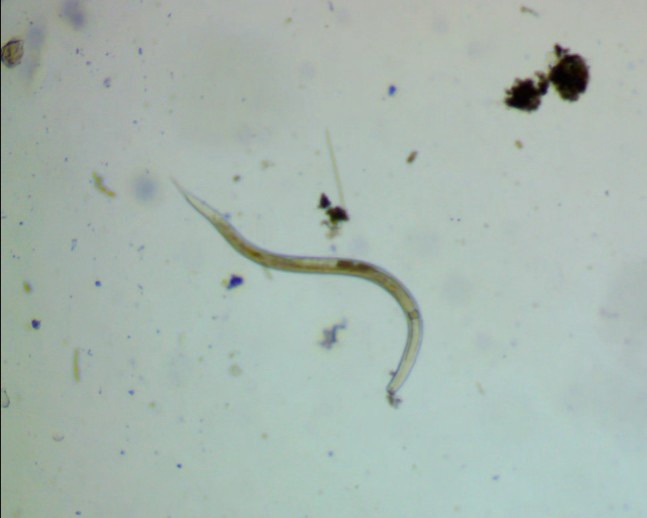
Method 2 had more ciliates, more rotifers and an active nematode.
Method 3 had noticeably more debris and many active rotifers crawling, searching and several filter feeding.
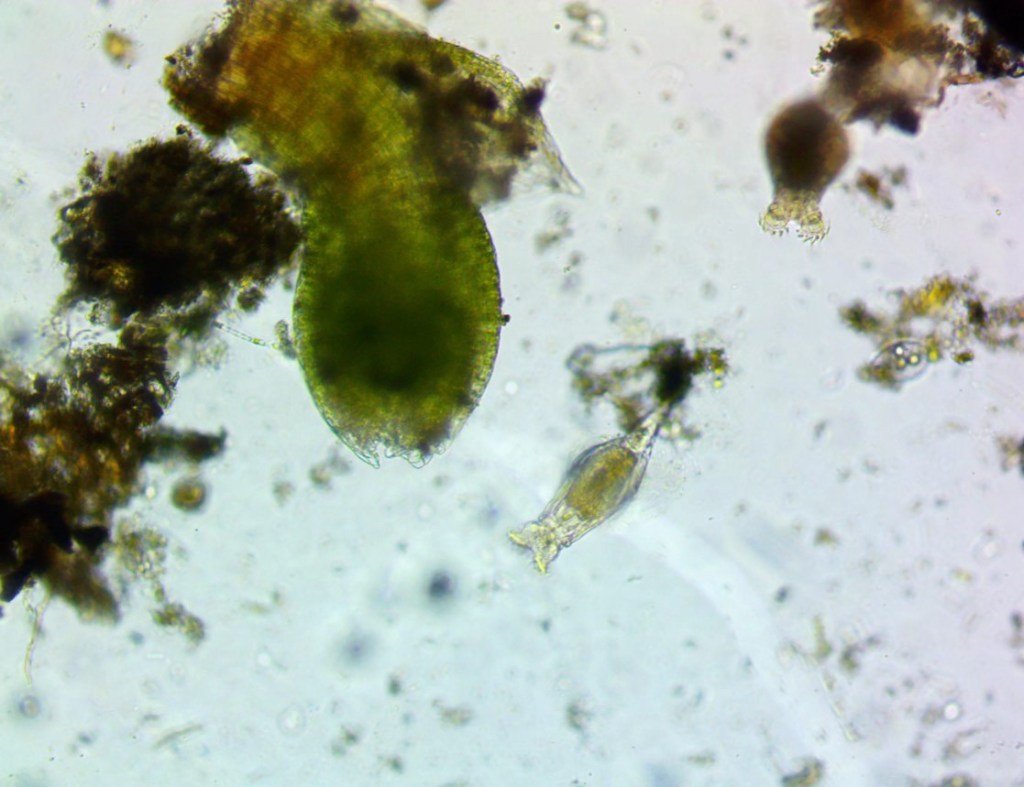
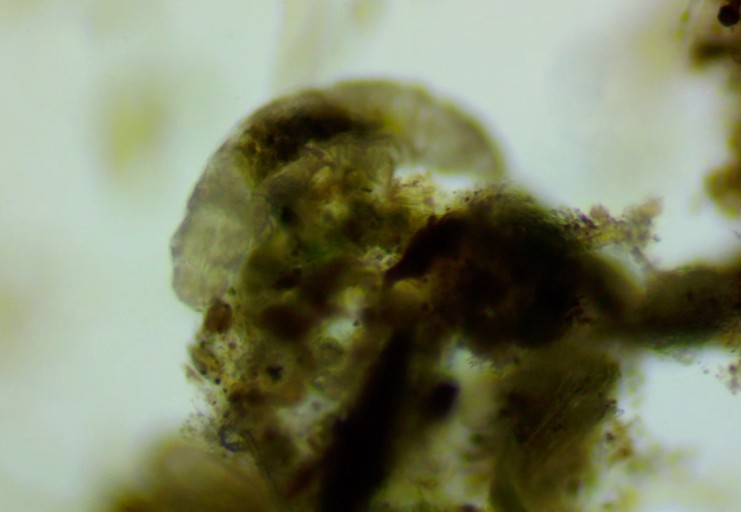
Method 4 had much denser debris, making it harder to observe, but we had nematodes, rotifers and two tardigrades.

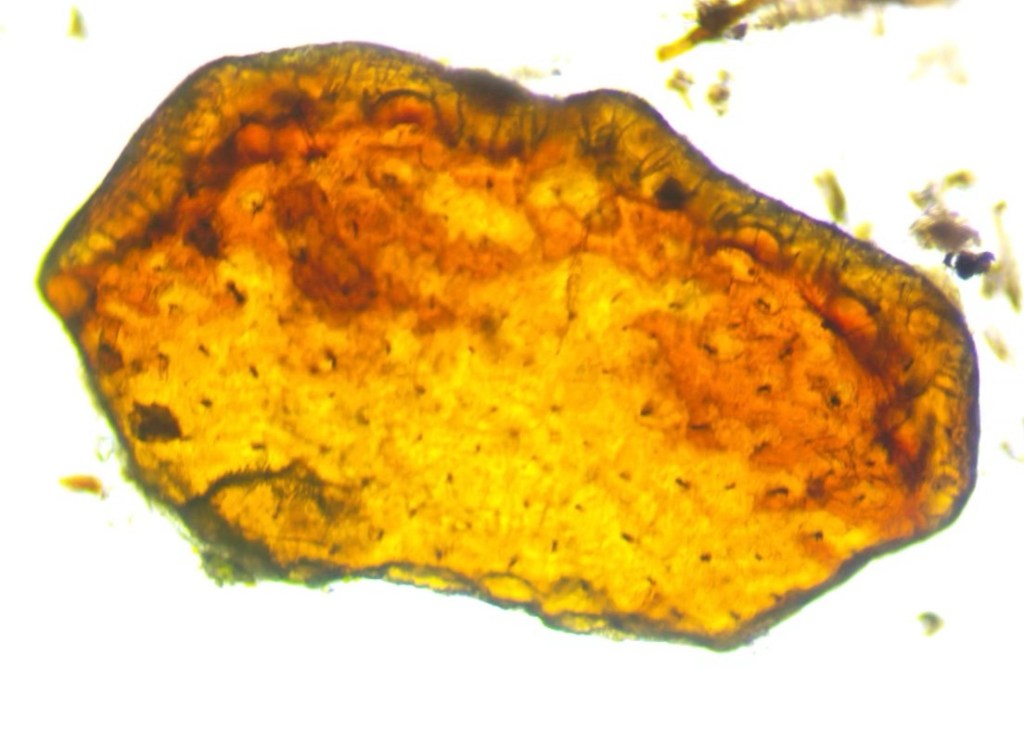
We also found a mysterious object, that glowed like amber. Look carefully and you’ll notice that the top edge has hairs along it and the main part has indentations and spots. I am guessing this part of an arthropod exoskeleton, which one I am not sure! I love the mysteries that Moss Safari presents.
Comments and Feedback
The technicians in the audience were able to send messages in the chat function of this online Moss Safari. We also had time for questions at the end. Here are some of the questions and comments:
I definitely look at the moss with new eyes!
Andy, how do you differentiate between a rotifer and gastrotrich?
Thank you Andy I’m just referring to your Big Five sheet which we have laminated.
My daughter taught me about tardigrades so I’m sharing this with her!!
I think its fab – I have used this as an activity week task and regularly find tardigrades, just great to hear more about the organisms and the different methods for extracting them
Never done this but have been keen. Hope can persuade the department to have a go.
We do the Moss safari for the open evening and it is great!
For me, it’s great to have technicians coming back for more, to have new people being introduced and the enthusiasm from technicians to use Moss Safari in their departments.
Acknowledgments
Thank you to Veeny Grimes from The Science Hub (East Herts, Essex, Beds and MK) for inviting me to this event and supporting Moss Safari. Thanks to all the science technicians at this session for their enthusiasm and interest. The equipment I used was supplied by VITTA Education whom I collaborate with. See below.
Equipment
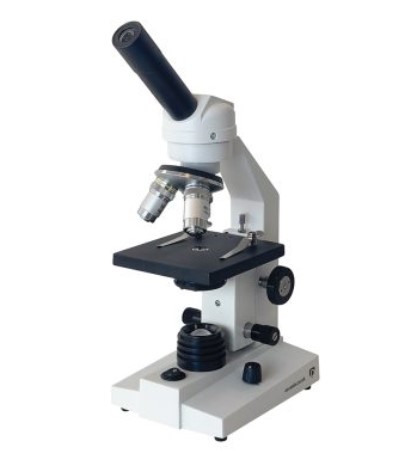
The technicians asked about the equipment I was using:
VITTA Education supplied the equipment used for this Moss Safari:
Microscope BMS146 FLArQ LED Monocular
For the full range of microscopes and accessories see:
https://vittaeducation.com/product-category/lab-equipment/benchtop-appliances/microscopy/
For Moss Safari kits and Guide Book


Want a visit from Moss Safari?
Find out about Events and outreach
